
Dental veneers have become one of the most popular cosmetic treatments for improving the appearance of a smile. Whether you are looking to address discolored, chipped, or misaligned teeth, veneers can help create a smooth and natural-looking smile. If you're considering getting dental veneers in Oxnard, it’s important to understand the process from start to finish so you know exactly what to expect.
This guide will take you through the step-by-step process of getting dental veneers, from the initial consultation to the final placement, helping you feel informed and confident about your decision.
What Are Dental Veneers?
Before delving into the process of getting dental veneers, it’s important to first understand what they are. Dental veneers are thin, custom-made shells that are placed on the front of your teeth. They are typically made from porcelain or composite resin and are designed to improve the appearance of your smile by covering imperfections such as:
Stains or discoloration
Chips or cracks
Gaps between teeth
Misalignment
Uneven teeth
Veneers are a durable and aesthetic solution to cosmetic dental issues, and with proper care, they can last for many years.
Step 1: Initial Consultation
The first step in the process of getting dental veneers in Oxnard is scheduling an initial consultation with a cosmetic dentist. During this consultation, the dentist will evaluate your oral health and discuss your aesthetic goals to determine if veneers are the right option for you.
What Happens During the Consultation?
Examination: The dentist will examine your teeth, gums, and overall oral health to ensure that you are a good candidate for veneers. If you have any underlying dental issues such as gum disease or tooth decay, these will need to be addressed before proceeding with veneers.
X-Rays and Impressions: In some cases, the dentist may take X-rays or digital impressions of your teeth to better understand the structure of your mouth and plan the placement of the veneers.
Discussion of Goals: You’ll discuss the look you want to achieve with your veneers. The dentist will show you different options for materials (porcelain or composite) and shades, and may provide you with a preview of how your smile could look after the veneers are placed.
Deciding on Veneers
If you and the dentist agree that veneers are the right choice, the next step is to create a personalized treatment plan tailored to your needs.
Step 2: Tooth Preparation
Once you have decided to move forward with veneers, the next step is tooth preparation. This step ensures that the veneers fit properly and blend naturally with your existing teeth.
Enamel Removal
The dentist will typically remove a small amount of enamel from the front surface of your teeth. This is necessary to create space for the veneer and ensure it adheres properly to the tooth. The amount of enamel removed is minimal, usually less than a millimeter, and ensures that the veneer will fit snugly and look natural.
If you're getting multiple veneers, the dentist will prepare all the teeth involved in the treatment at this stage. Depending on the number of veneers, the process can take anywhere from 1 to 2 hours.
Local Anesthesia
To ensure that you are comfortable during this step, the dentist will usually apply a local anesthetic to numb the area. Most patients report minimal discomfort during the procedure, but the anesthetic ensures that any potential discomfort is minimized.
Temporary Veneers
In some cases, the dentist may place temporary veneers over your teeth while the permanent ones are being fabricated. These temporary veneers help protect your teeth and allow you to maintain your aesthetic appearance while you wait for the permanent veneers to be created.
Step 3: Taking Impressions and Shade Selection
Once your teeth are prepared, the next step is to take impressions of your teeth. These impressions will be used to create the custom veneers that will perfectly fit your teeth.
Impressions for Custom Fit
The dentist will take digital impressions or traditional mold impressions of your prepared teeth. These impressions are critical in creating veneers that will fit comfortably and securely over your teeth. The impression ensures that each veneer is crafted to match the unique contours of your teeth.
Shade Selection
Choosing the right shade for your veneers is a crucial step. The dentist will help you select a color that blends naturally with the rest of your teeth. If you want to achieve a brighter smile, the dentist may help you choose a shade that matches your aesthetic goals while ensuring that it still looks natural.
Sending to the Lab
Once the impressions and shade are finalized, they are sent to a dental laboratory where the veneers are custom-made. The lab typically takes 1 to 2 weeks to create the veneers. During this time, you may be asked to wear temporary veneers to protect your teeth.
Step 4: Fabrication of Permanent Veneers
The fabrication of dental veneers is a delicate process that requires a high level of skill and precision. Dental laboratories use advanced techniques and materials to create veneers that are durable, natural-looking, and custom-designed to fit your teeth perfectly.
Porcelain vs. Composite Veneers
The dentist will work with the laboratory to decide on the material for your veneers. Porcelain veneers are typically preferred for their durability, stain resistance, and ability to mimic the natural look of tooth enamel. Composite veneers are a more affordable option but may not last as long or look as natural as porcelain.
Crafting the Veneers
The dental lab will craft the veneers based on the impressions and specifications provided by the dentist. The laboratory will focus on creating veneers that match the size, shape, and color that were agreed upon during the consultation.
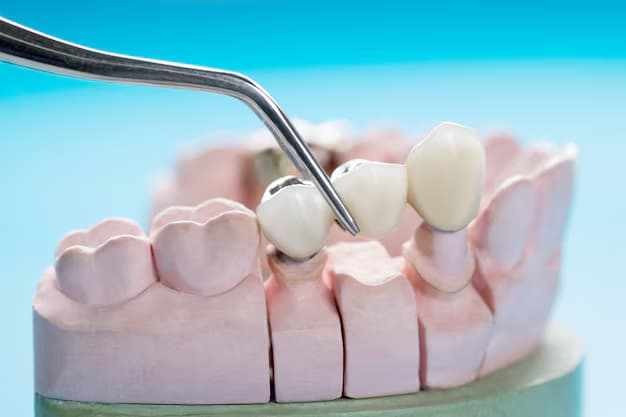
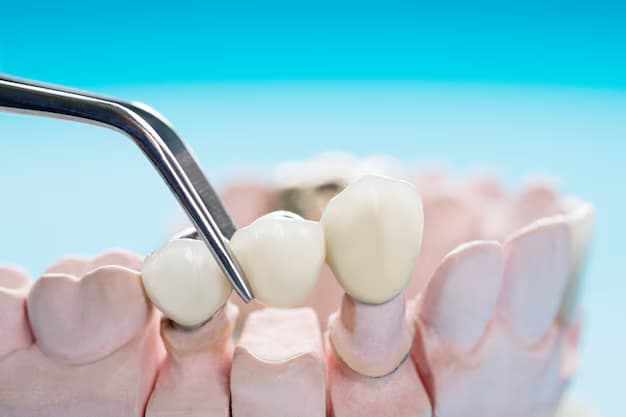
Step 5: Placing the Veneers
Once your custom veneers are ready, you will return to the dentist’s office for the placement appointment. This step involves bonding the veneers to your teeth.
Preparing the Veneers
Before placing the veneers, the dentist will ensure that they fit properly and look natural. Minor adjustments may be made to the veneers to ensure they align correctly with the rest of your teeth.
Bonding the Veneers
The dentist will clean and etch the surface of the prepared teeth to ensure a strong bond. Then, a special adhesive will be applied to each veneer, and the veneers will be carefully placed on your teeth. The dentist will use a curing light to harden the adhesive, which will ensure the veneers are securely bonded.
Final Adjustments
Once the veneers are bonded, the dentist will make any final adjustments to ensure they fit comfortably and look natural. This may include polishing the veneers and ensuring that your bite is properly aligned.
Step 6: Post-Placement Care and Follow-Up
After your veneers have been placed, you’ll need to follow the dentist's aftercare instructions to ensure your veneers stay in top condition.
Caring for Your Veneers
While dental veneers are durable, it’s important to care for them properly. This includes maintaining good oral hygiene by brushing and flossing regularly. Avoid habits that could damage your veneers, such as biting on hard objects or using your teeth as tools.
Regular Check-ups
Your dentist will likely schedule follow-up appointments to monitor the condition of your veneers and ensure that they are functioning well. Regular dental check-ups are important to maintain your oral health and ensure the longevity of your veneers.
Conclusion
Getting dental veneers in Oxnard can be a transformative process, giving you a bright, beautiful smile that enhances your confidence and overall appearance. By understanding the step-by-step process, you can feel more prepared and confident about moving forward with your cosmetic dental treatment.
If you are considering dental veneers and are looking for experienced professionals in Oxnard, Puri Dentistry offers personalized care and expertise to help you achieve the smile you’ve always wanted. With attention to detail and the latest techniques, Puri Dentistry is committed to providing patients with high-quality results that last.


Write a comment ...